The Easiest Way to Clean a Keyboard
No matter how hard we try to keep our keyboards from accumulating dirt, dust, and grime, regular use takes its toll. Thankfully cleaning your keyboard and restoring it to its original glory is easier than it may seem.
Below we will explain the simplest steps to clean a keyboard, as well as some helpful tips and tricks. For other ideas on cleaning household items check out our top green cleaning tips.
Basic Cleaning
1. Unplug your keyboard
This may sound obvious, but many of us are guilty of skipping this step. Disconnecting your keyboard protects your computer and helps you avoid sending accidental messages or triggering unwanted computer processes with keyboard shortcuts.
2. Clean the keys
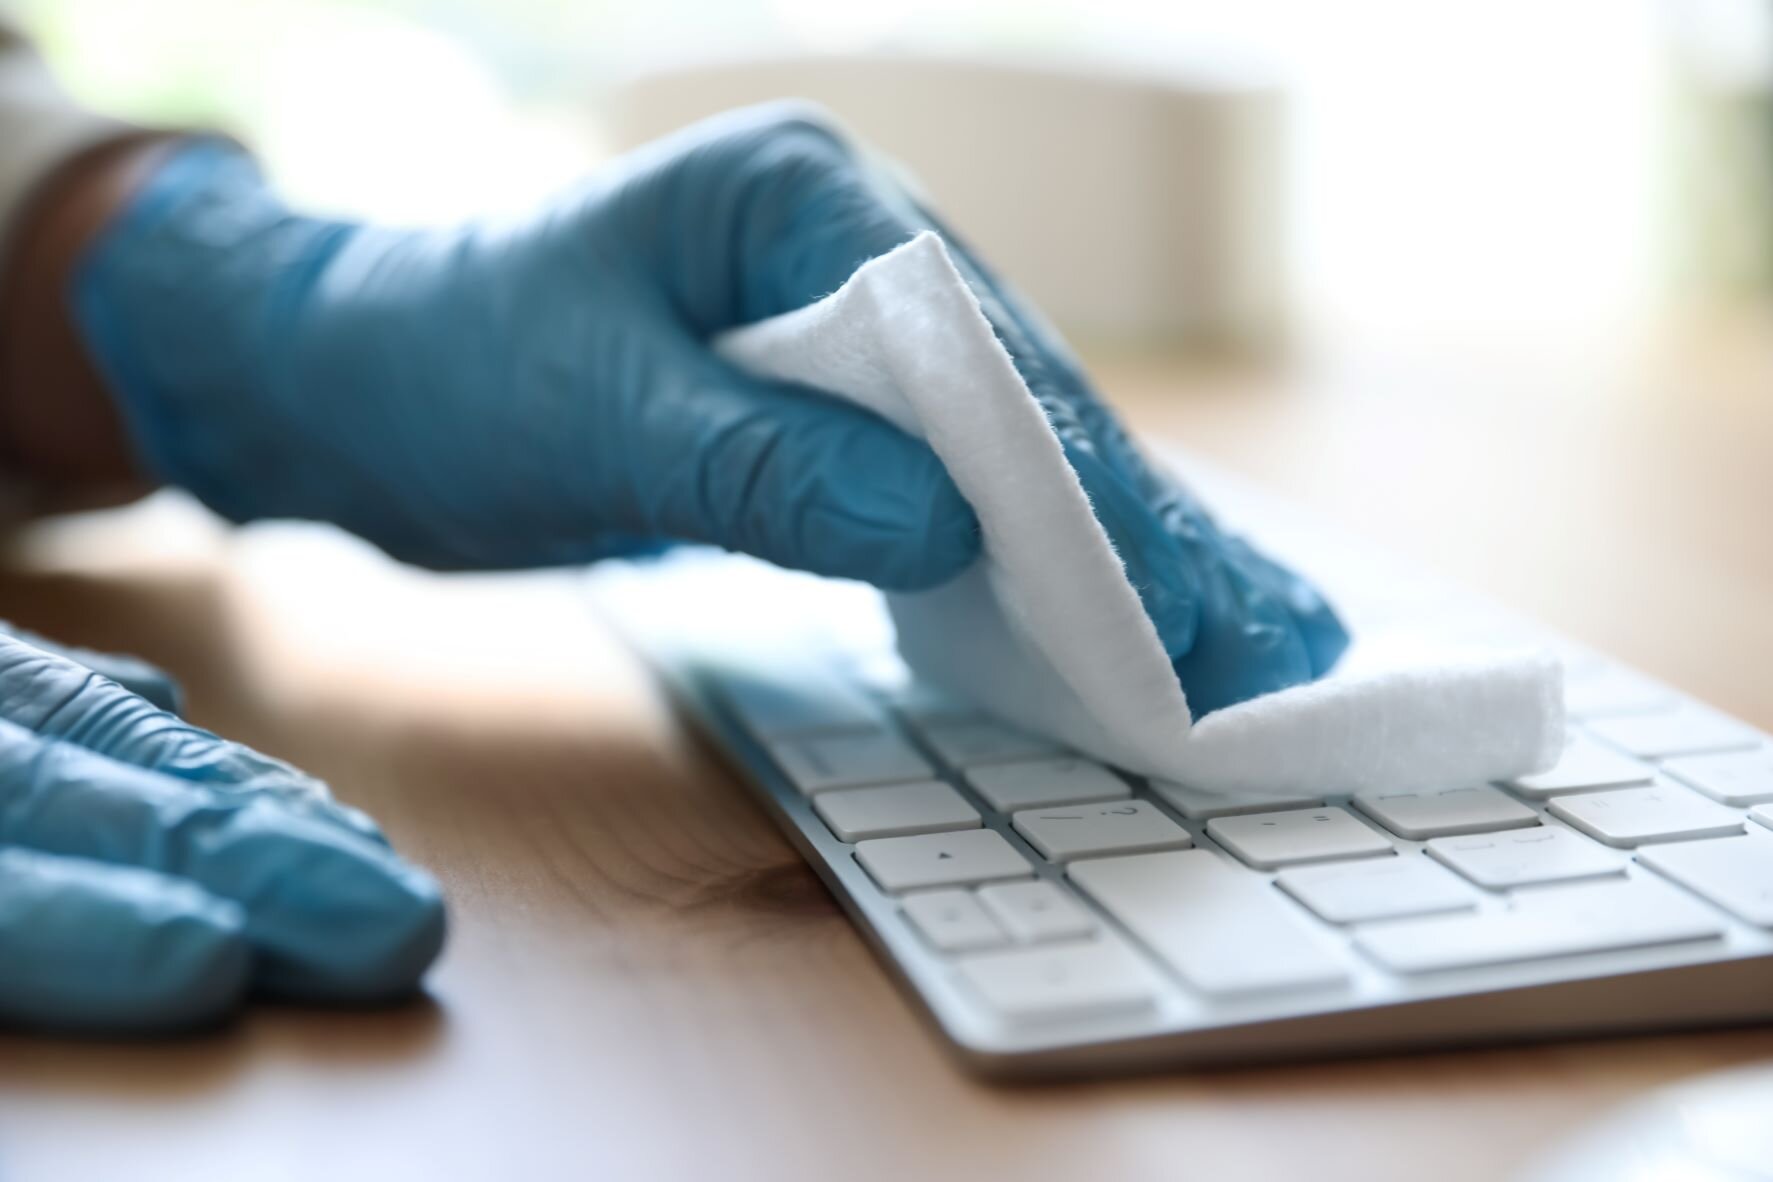
One of the most common places that keyboards get dirty is directly on the top of the keys, known as the keycaps. To clean them use Isopropyl Alcohol and a cotton swap or microfiber cloth. Simply dip the cloth or swap into the alcohol and rub it onto the dirty keys. Be careful to avoid spilling or dumping too much liquid on the keyboard!
3. Get rid of dust or debris
Next, move on to what's under the keys. Turn the keyboard upside down to gently shake out any excess dust or pet hair. If you have an external keyboard this is a good time to tilt it around and listen for any lodged debris. After turning the keyboard upright use condensed air to blow in between the keys and dislodge any remaining dust. If you have vacuum with a crevice adapter that can help to clean the key bed.
Depending on how dirty your keyboard is this may be enough. If so, stop here and plug the keyboard back in. If there is still dust, pet hair, or other debris under the keys, or if any of the keys are not working properly, then it is time for deep cleaning.
Deep Cleaning
4. Take a picture of the keyboard
Before removing the keycaps take a picture of the keyboard layout to make it easier to put the keycaps back on once you finish
5. Determine what kind of keyboard you have
The two primary types of keyboards are mechanical and membrane. The type of keyboard impacts the ways you can clean them. Mechanical keyboards use individual switches for each key whereas membrane keyboards use rubber domes under the keycaps that touch a silicone membrane layer running through the keyboard.
How do I know which kind I have?
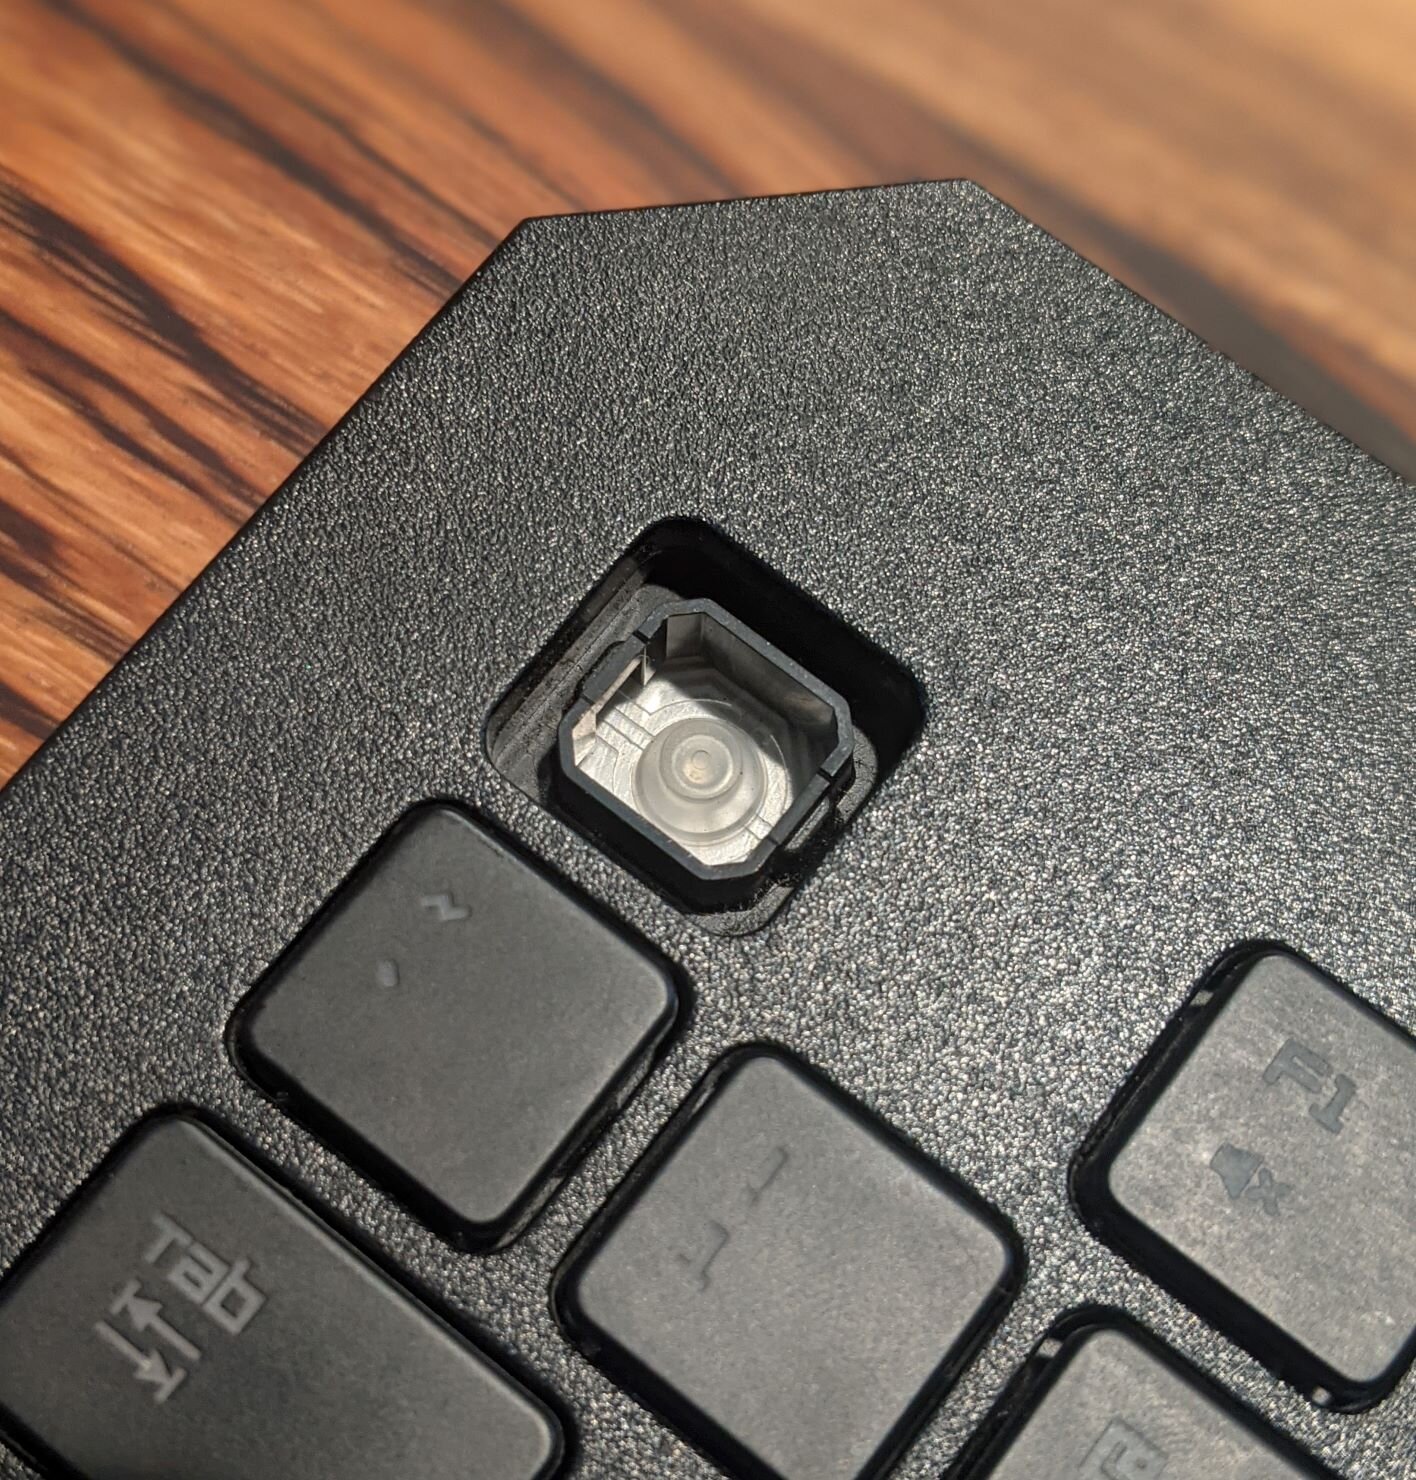
Laptop keyboards or those with low profile keys are membrane keyboards. Mechanical keyboards, often recognized as gaming keyboards, have taller keys that make the distinct ‘click clack’ keyboard sound while typing. If you have external keyboard with large keys and are unsure if it is mechanical, try removing one key to check underneath. If they key comes off easily and there is a raised piece with a + on the switch underneath, then it is mechanical (top image shown below). If there is a lot of resistance removing the key, or if there is soft flexible piece underneath the key then it is a membrane keyboard (bottom image shown below).
Since mechanical keyboards have easily removable and replaceable keys, they are easier to clean. However the spaces between membrane keyboard keys tend to be self-contained enclosed which helps them resist accumulating debris in-between the keys.

Mechanical Switch
Membrane switch
6. Remove the keycaps and clean the keybed
Mechanical keyboard:
Use either a keycap removal tool, or a small screwdriver to pop the keys off.
Once the keycaps are off you can scrub them with soap, water, and a brush, and clean away any excess debris left on the keybed.
If you have sticky keys then use the Isopropyl Alcohol and cotton swab combo to clean around all the individual switches, depressing them slightly to clean around the inside lip of the switch.
External membrane keyboard:
Turn the keyboard upside down and use a screwdriver to remove the back panel screws.
Use a flathead screwdriver in between the front and back pieces of the keyboard popping them apart.
Separate the two pieces and set the bottom piece with the pressure plates aside -- you won’t need it until re-assembly.
Use the flathead screwdriver or a keycap removal tool to carefully remove the keycaps. They are usually held in place by two clips at each end of the key.
Once the keycaps are off you can scrub them and the top piece of the keyboard with soap, water, or Isopropyl Alcohol.
Laptop keyboard:
Not all laptop keys are removable so check online with your manufacturer if you are unsure.
If they are removable carefully use either a keycap removal tool or a small screwdriver to pop the keys off. They are usually held in place by two clips at each end of the key – be extra careful here as the clips are often plastic.
Once the keycaps are off you can scrub them with soap, water, and a brush.
Clean around the keybed with condensed air and Isopropyl Alcohol.

Keycaps in UV8LED UV Sanitizer
7. Sanitize!
With the keycaps removed it's a great time to use a UV sanitizer to ensure that you are killing any remaining germs on the keys!
8. Put the keycaps back on
Once all pieces of the keyboard are fully dry replace the keycaps and reassemble to two halves of the keyboard (if applicable). This is where the picture you took of the keys in step 5 comes in handy!
9. Plug the keyboard back in and turn on the computer
With everything plugged back you it's a good time to test that all the keys are working.